이 포스트는 2021.12~2022.09 기간동안 벨로그에 작성한 글을 티스토리에 옮겨 적은 것입니다.

Unit 1-3 : Build a basic layout
안드로이드에서의 ui 요소를 view 라고 함.
그래서 TextView , ImageView 등등 ㅇㅇ뷰 형태로 이름붙여져 있는 것..
Views를 구성하려면 컨테이너에 배치해야 함.
ViewGroup은 View 객체가 있을 수 있는 컨테이너임.
ViewGroup의 한 종류인 ConstraintLayout을 통해 내부 Views를 유연한 방식으로 정렬할 수 있다.
ui 요소를 클릭하면 오른쪽의 attribute의 layout 섹션에 있는 Constraint Widget를 사용하면 ConstraintLayout까지의 margin을 쉽게 조절할 수 있다.
이미지뷰를 여백 없이 배치했는데도 빈 공간이 남는다면 ScaleType을 사용할 수 있다.
뷰가 쌓이는 순서는 Component Tree에서 조절할 수 있다.
완전 간편..😲
적절한 코딩 사례 채택
텍스트뷰에 '하드코딩되었다.' 는 주의 문구가 뜨는데 이는 코드에 직접 문자열을 넣어서 다른 언어로 번역하기 어렵고 다른 위치에서 재사용할 수 없다는 뜻이다.
이를 해결하기 위해서 app > res > values > strings.xml 파일을 열어서 문자열 추가.
<resources>
    <string name="app_name">Happy Birthday</string>
    <string name="happy_birthday_text">Happy Birthday, Sam!</string>
    <string name="signature_text">From Emma.</string>
</resources>
그리고 텍스트 부분을 string.xml 파일에서 정의한 이름으로 넣어주면 됨.
노란 삼각형을 클릭하고 Suggested Fix아래 버튼을 클릭하면 알아서 문자열을 추출해서 고쳐준다.
이미지뷰에는 contentDescription 에 관련된 경고문구가 뜬다. 이는 장애가 있는 사용자가 앱을 탐색할 때 더 쉽게 앱과 상호작용할 수 있도록 UI 요소의 목적을 정의하여 음성 안내 지원과 함께 앱을 더 유용하게 활용할 수 있도록 하는 속성이다.
그러나 이 앱의 이미지는 장식 목적으로만 포함되므로 사용자에게 표시되는 콘텐츠 설명을 설정하는 대신 importantForAccessibility 속성을 no로 설정하여 음성 안내 지원에 ImageView를 건너뛰라고 지시할 수 있다.
참고자료: https://developer.android.com/courses/pathways/android-basics-kotlin-three
Unit1-4: Add a button to an app
클래스
fun main() {
     val diceRange = 1..6
     val randomNumber = diceRange.random()
     println("Random number: ${randomNumber}")
}
코틀린에서 범위는 점 두개로 나타낼 수 있다.
fun main() {
    val myFirstDice = Dice()
    println(myFirstDice.sides)
    myFirstDice.roll()
}

class Dice {
    var sides = 6
    fun roll() {
        val randomNumber = (1..6).random()
        println(randomNumber)
    }
}
객체 클래스를 정의하는 방식은 위와 같다.
Dice 클래스의 roll 함수가 randomNumber을 반환하도록 수정해 보자.
fun main() {
    val myFirstDice = Dice()
    val diceRoll = myFirstDice.roll()
    println("Your ${myFirstDice.sides} sided dice rolled ${diceRoll}!")
}

class Dice {
    var sides = 6

    fun roll(): Int {
        val randomNumber = (1..6).random()
        return randomNumber
    }
}
형식은 fun roll(): Int { return 숫자 } 이다.
(※ 참고로 val은 불변 변수, var은 가변 변수)
모든 주사위가 6면은 아니므로, randomNumber의 범위를 변수를 사용해서 지정하자.
val randomNumber = (1..sides).random()새 인스턴스를 만들 수 있도록 다이스 클래스를 수정해보자.
fun main() {
    val myFirstDice = Dice(6)
    println("Your ${myFirstDice.numSides} sided dice rolled ${myFirstDice.roll()}!")

    val mySecondDice = Dice(20)
    println("Your ${mySecondDice.numSides} sided dice rolled ${mySecondDice.roll()}!")
}

class Dice (val numSides: Int) {

    fun roll(): Int {
        return (1..numSides).random()
    }
}
액티비티
Activity는 앱이 UI를 그리는 창을 제공한다. 모든 앱에는 Activity가 하나 이상 있다.
MainActivity는 아래와 같이 생겼다.
package com.example.diceroller

import androidx.appcompat.app.AppCompatActivity
import android.os.Bundle

class MainActivity : AppCompatActivity() {

   override fun onCreate(savedInstanceState: Bundle?) {
       super.onCreate(savedInstanceState)
       setContentView(R.layout.activity_main)
   }
}
모든 코틀린 프로그램은 main 함수가 있어야 한다고 배웠지만...Android 앱은 다르게 작동한다. main() 함수를 호출하는 대신 Android 시스템은 앱이 처음 열릴 때 MainActivity의 onCreate() 메서드를 호출한다.
override fun onCreate(savedInstanceState: Bundle?) {
        super.onCreate(savedInstanceState)
        setContentView(R.layout.activity_main)

        val rollButton: Button = findViewById(R.id.button)
        rollButton.setOnClickListener {
           val toast = Toast.makeText(this, "Dice Rolled!", Toast.LENGTH_SHORT)
           toast.show()
       }
    }
findViewById를 통해 Button타입의 변수 rollButton을 추가하고, 리스너를 붙여주었다. 이제 버튼을 누르면 토스트 메세지가 나타난다.
when 문 사용
fun main() {
    val myFirstDice = Dice(6)
    val rollResult = myFirstDice.roll()
    val luckyNumber = 4

    if (rollResult == luckyNumber) {
        println("You win!")
    } else if (rollResult == 1) {
        println("So sorry! You rolled a 1. Try again!")
    } else if (rollResult == 2) {
        println("Sadly, you rolled a 2. Try again!")
    } else if (rollResult == 3) {
        println("Unfortunately, you rolled a 3. Try again!")
    } else if (rollResult == 5) {
        println("Don't cry! You rolled a 5. Try again!")
    } else {
        println("Apologies! You rolled a 6. Try again!")
    }
}
주사위를 굴려서 값에 따라 결과가 나온다고 할때, if문을 너무 많이 써야 하면 번거롭다..이럴때 when을 사용할 수 있다.
fun main() {
    val myFirstDice = Dice(6)
    val rollResult = myFirstDice.roll()
    val luckyNumber = 4

    when (rollResult) {
        luckyNumber -> println("You won!")
        1 -> println("So sorry! You rolled a 1. Try again!")
        2 -> println("Sadly, you rolled a 2. Try again!")
        3 -> println("Unfortunately, you rolled a 3. Try again!")
        5 -> println("Don't cry! You rolled a 5. Try again!")
        6 -> println("Apologies! You rolled a 6. Try again!")
    }
}
저 화살표가 좀 생소한데 그래도 익숙해지면 간편할 것 같다..
val drawableResource = when (diceRoll) {
   1 -> R.drawable.dice_1
   2 -> R.drawable.dice_2
   3 -> R.drawable.dice_3
   4 -> R.drawable.dice_4
   5 -> R.drawable.dice_5
   else -> R.drawable.dice_6
}

diceImage.setImageResource(drawableResource)
when 표현식은 값을 반환해 변수에 넣는 식으로도 사용할 수 있다. 단 이 경우, drawableResource에 항상 값이 들어가야 하므로 else를 추가해주자.
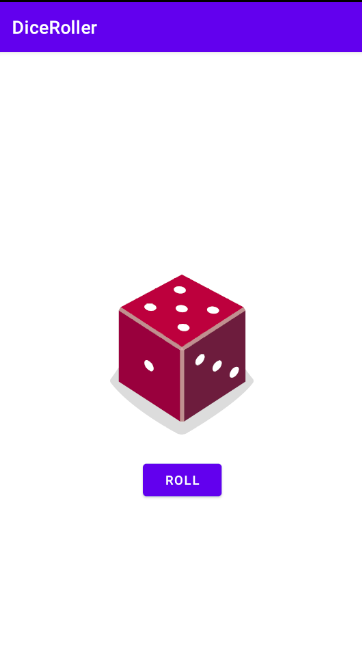
실습:Dice Roller
단위 테스트
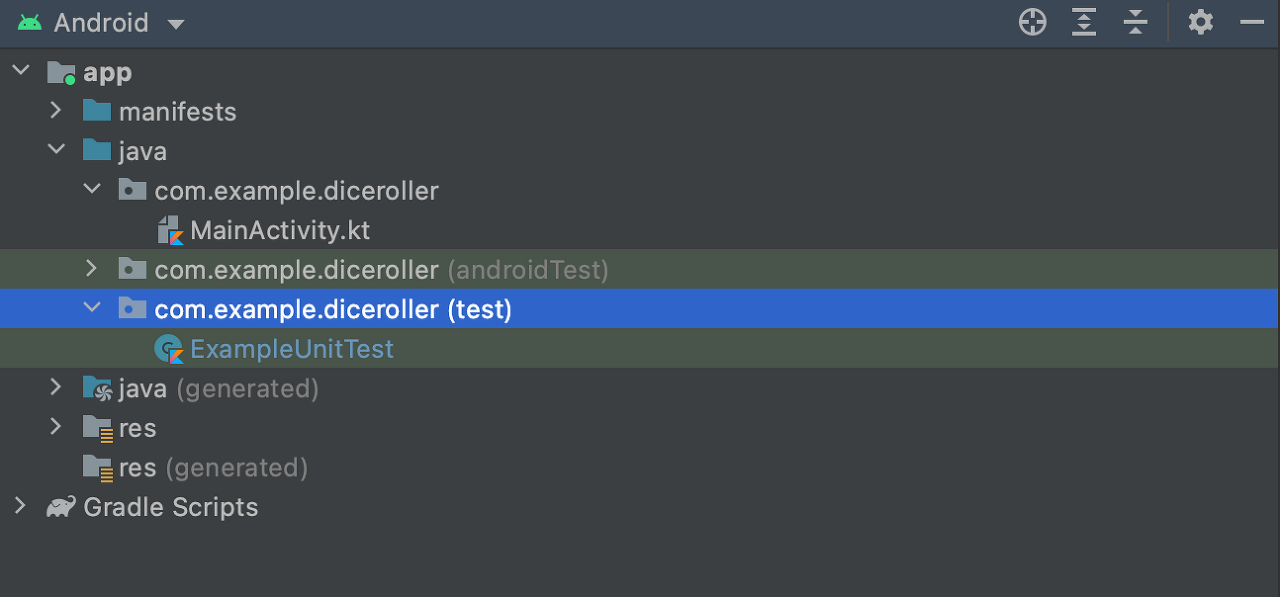
단위 테스트는 항상 test 디렉토리에 있다.
class ExampleUnitTest {
   @Test
   fun addition_isCorrect() {
       assertEquals(4, 2 + 2)
   }
}
ExampleUnitTest.kt의 초기 모습이다. addition_isCorrect() 함수는 오른쪽 값의 결과가 기댓값(왼쪽 값)과 같아야지 테스트를 통과 시킨다. 만약 왼쪽 인자로 2+3을 넣는다면 테스트는 실패할 것이다.
@Test
fun generates_number() {
  val dice = Dice(6)
  val rollResult = dice.roll()
  assertTrue("The value of rollResult was not between 1 and 6", rollResult in 1..6)
}
다이스 프로그램에 맞는 단위테스트를 작성하자.
assertTrue는 오른쪽의 조건이 false면 왼쪽의 문자열을 출력한다. 주사위를 던져 나온 값이 1~6사이의 값인지 테스트하였다.
디버깅
앱에서 로그로 인한 비정상 종료가 발생하면 logcat을 확인하자. 하지만 보통은 텍스트가 너무 많아 왜 오류가 발생했는지 알기 어렵다.
이때 RuntimeException 과 caused by 구문을 찾으면 몇번째 줄에서 왜 에러가 발생했는지 알 수 있다.
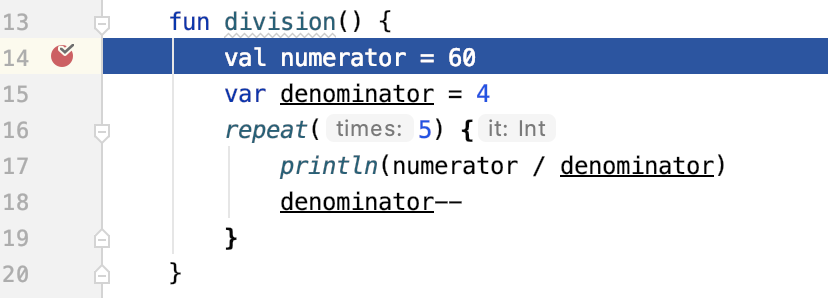
또한 줄 번호 옆 빈 공간을 클릭하면 중단점이 생기는데 이를 활용할 수도 있다. 이 상태에서 Run > Debug 'app' 을 하면...

화면 하단에 새로운 디버그 탭이 생긴다.
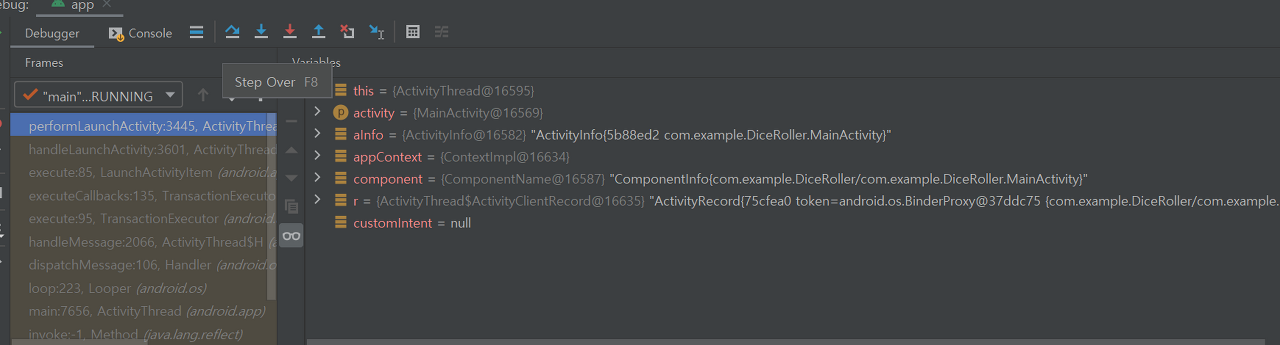
step over을 눌러서 중단점 라인부터 한 줄 한 줄 실행해 볼 수 있다. 버그가 생긴 라인에서 실행이 중지되었으며, 정확한 이유를 알 수 있다.
참고자료:https://developer.android.com/courses/pathways/android-basics-kotlin-four

'개발 관련 공부 > 코틀린' 카테고리의 다른 글
| Unit3-1(1) (0) | 2022.09.13 |
|---|---|
| Unit2-3 (1) | 2022.09.13 |
| Unit2-2 (0) | 2022.09.13 |
| Unit2-1 (0) | 2022.09.13 |
| Unit1-1 & Unit1-2 (0) | 2022.09.13 |


댓글